Connecting Data
The properties of a component can be connected to a key or value in a data store.
The data stores can be found in the same area as the component tree, but with the "Data" tab selected.
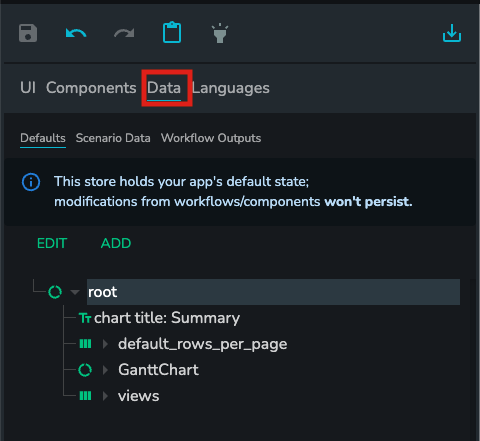
Each data store is a JSON object that can be explored in the "Data viewer"
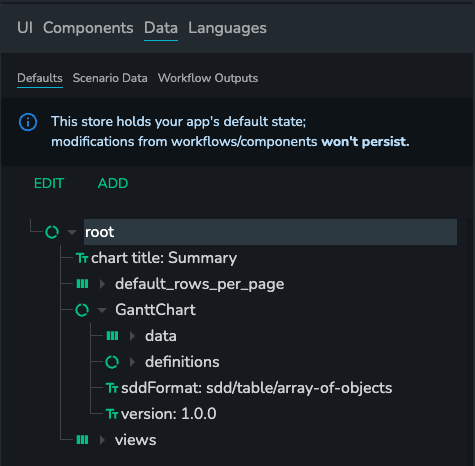
A component can either be connected directly to a data store, or the data can go through a workflow before being served to the component.
In a Dais app, components can dynamically reference data from various stores. These stores serve different roles—ranging from static defaults to scenario-specific inputs and runtime outputs. Understanding how they work is essential for building modular, interactive applications.
Data Stores
Currently there are four main data stores and one optional store (Scenario Meta) that can be utilized in a Dais App. Four main data stores include: Defaults, Scenario Data, Workflow Outputs and Data Schemas.
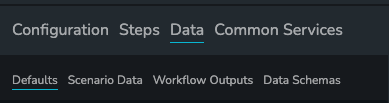
Defaults
This store manages your app's initial configuration and provides a controlled environment for temporary modifications. Defaults store is shared across the scenarios.
Understanding Default States
The Default State Store consists of three interconnected substates, which are visually distinguished within the user interface:
- Persisted Default State: This represents the officially saved default values for your application. It is loaded from storage when the app starts. This state is un-marked and displayed as regular text within the UI.
- Current Default State: This holds any new default values that have been edited through an "Edit" button. These changes are not immediately persisted but can be saved permanently. This state is highlighted in blue within the UI.
- Active Value: This reflects the state being actively used by components and workflows. It allows for temporary modifications to the defaults without affecting the persisted or current default values. This state is highlighted in yellow within the UI.
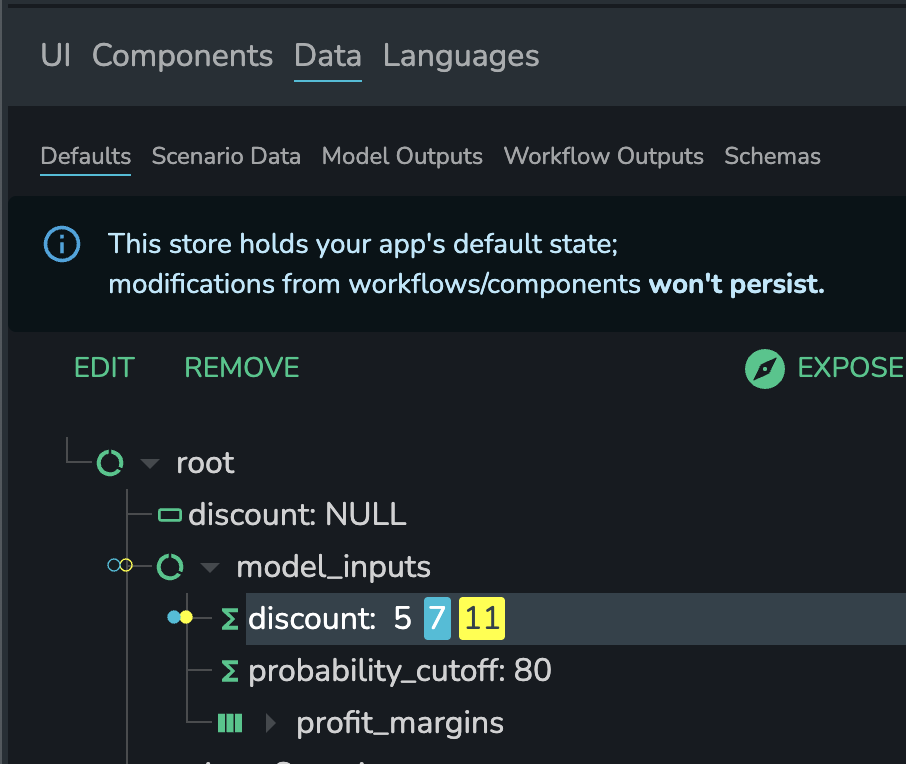
This visual differentiation helps to clearly understand which values are fixed, being edited, and currently in use.
Key Features:
- Controlled Modification: Allows components and workflows to interact with and change default values temporarily, providing dynamic behavior while preserving core configuration.
- UI Feedback: Changes made to the Active Value are immediately reflected in the user interface.
- Persistence Management: The Current Default State provides a staging area for editing defaults before saving them permanently.
Use Cases:
- Defining initial settings for your application.
- Providing a starting point for scenario analysis or simulations.
- Creating interactive components with predefined default behavior (e.g., a dropdown menu with fixed options that users can select from but not change).
- This architecture ensures that while users can interact with and see the effects of modifications, the core application configuration remains consistent and controllable.
Scenario Data
This store acts as a dedicated container for data and settings that are unique to each individual scenario within your application.
Key Features:
- Scenario Isolation: Each scenario gets its own independent copy of the Scenario Data Store, ensuring that modifications made in one scenario do not affect others.
- Persistent Modifications: Changes made by workflows and components to the Scenario Data are persisted on save.
This makes it ideal for storing:
- Variable inputs and parameters unique to each scenario.
- Intermediate results and calculations generated during scenario execution.
- Any other data that needs to be preserved and accessible throughout the lifespan of a particular scenario.
Note: Unlike the Default State Store, this store does not use any visual highlighting to indicate changes.
Workflow Outputs
This store serves as a dedicated repository for the results generated by workflow executions. It provides a centralized and structured location for accessing completed task outputs without interfering with other data stores.
Key Features:
- Immutable Results: The Workflow Outputs Store is designed to be read-only. Changes can only be made through the successful execution of workflows, ensuring data integrity and traceability.
- Organized Access: Workflow outputs are stored in a structured manner, making it easy to locate and retrieve specific results based on workflow type, execution time, or other relevant criteria.
Use Cases:
- Building dashboards and reports that display key performance indicators derived from workflows.
- This store ensures that workflow outputs are readily available for further use.
Optional: Scenario Meta
This store provides a centralized location for metadata associated with individual scenarios. It is specifically designed to support the Scenario Picker Component and enhance its functionality.
Key Features:
- Metadata Storage: Holds information such as scenario names, descriptions, tags, or any other custom data that can help users understand and manage scenarios.
- Scenario Picker Integration: Provides additional context within the
View All Scenariostable of theScenario PickerComponent, making it easier to identify and select specific scenarios based on their metadata.
This store is an optional feature. To enable it:
- Navigate to the "Options" tab.
- Select "Experimental Features".
- Toggle on "Enable Scenario Meta Store".
- Once enabled, it will appear as a fourth store in the main store list.
Note: Modifications made to this store by workflows or components are not persisted.
Connecting Properties to Data
Each property in a component has a little link button to the right of the property field.
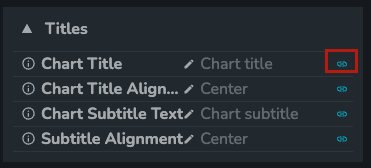
Clicking the link button will open a modal that allows you to select a path in any of the data stores discussed above. Once you are happy with the selection and accept the link the property for that component will be what the value is in the path of that data store.
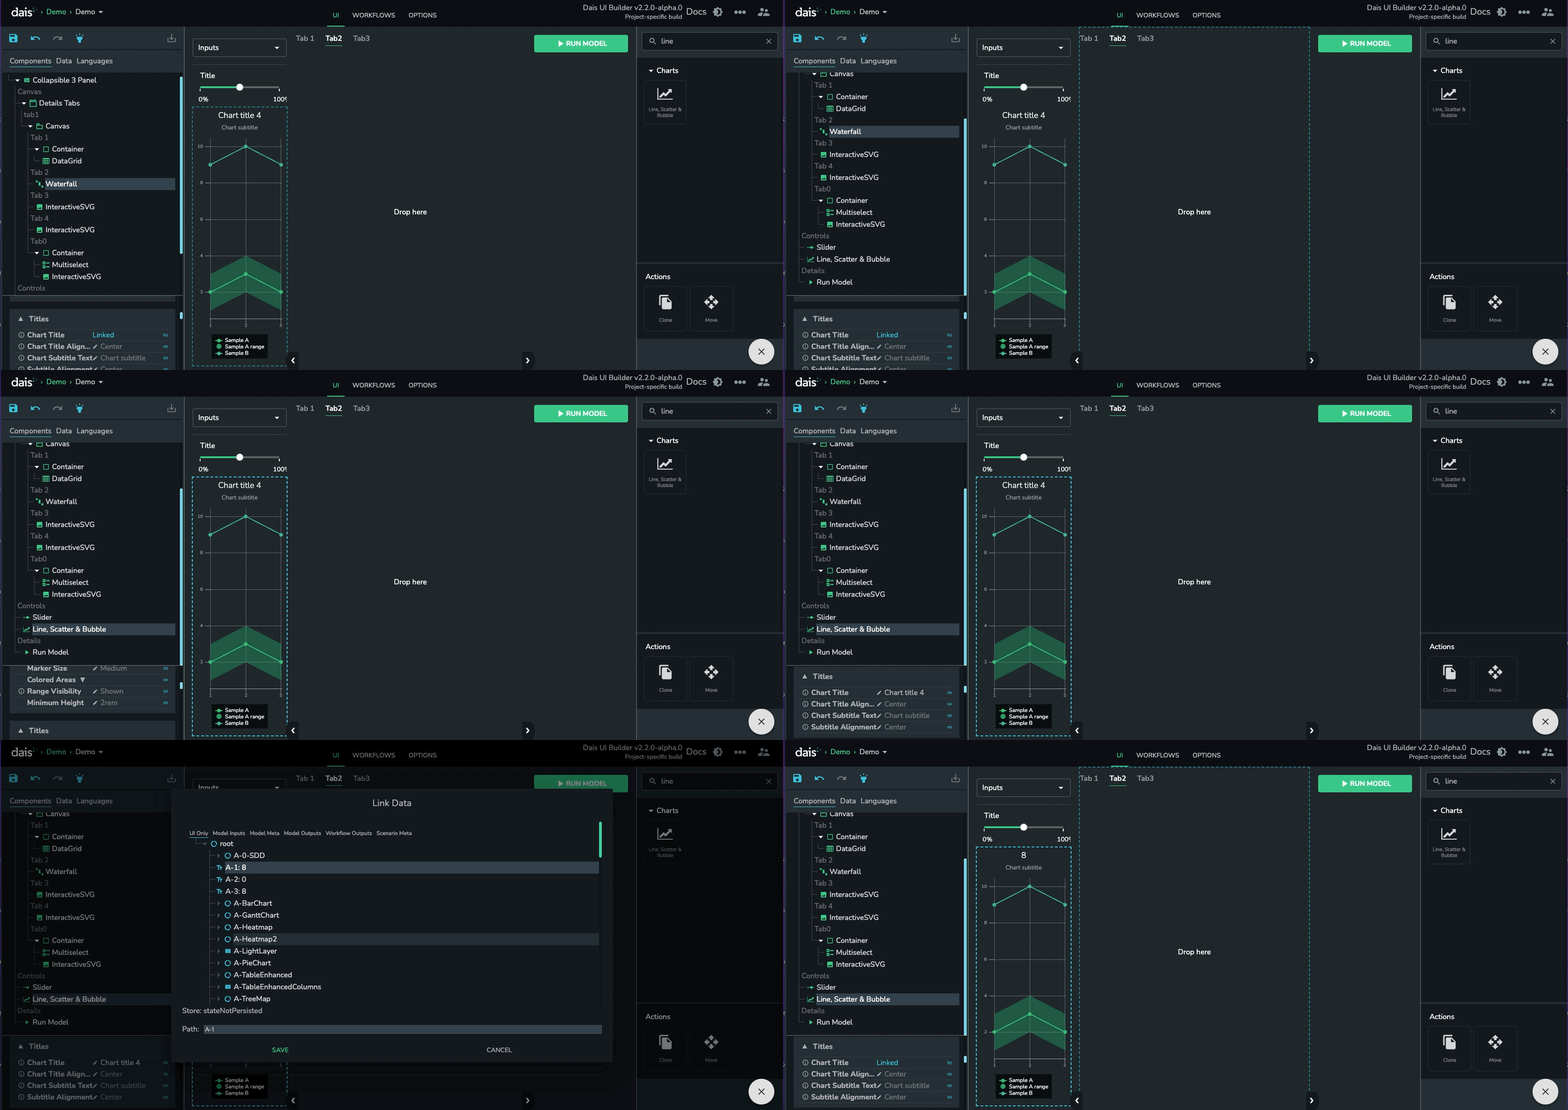
Advanced Link Paths
Dynamic keys in paths allow components to fetch different data values depending on user selections or app state, creating more flexible bindings.
The ability to have a key in your path to a data store be dynamic based on the value of a different path. In the path you can include the following syntax:
key1.key2.$<dataStore>:<pathInThatStore>$.key3
This will take the value of pathInThatStore in the dataStore and use that as a key in the path.
As an example...
You have a data structure as shown below and this is in the stateNotPersistedStore
{
    "myUIData": {
        "myBarChartLabels": {
            "production": "Risk for production",
            "inventory": "Risk for inventory"
        },
        "mySelectedMetric": "production"
    }
}
Now you may want to create a link to the title property of your bar chart, but you would like the title to change depending on what metric you have selected in a dropdown for example. When you link the title property you will select the path up to myBarChartLabels and then add a dynamic key that will use the value stored in mySelectedMetric as the next key in the path, so your final path will look something like
myUIData.myBarChartLabels.$stateNotPersisted:myUIData.mySelectedMetric$
Note: remember to paste the updated projectsetup.json into the Dais App Config to make the information available in the UI Builder
Schema Store
These schemas define expected data formats and validation rules that workflows and UI components depend on during runtime
Overview
The Schema Store serves as a repository for all data schemas, supporting both Dais SDD format and new JSON Schema. It consists of two main sections: user-created schemas and _generated, which contains all auto-generated definitions.
JSON Schema has been integrated into the user interface to enhance data validation and improve the overall user experience. This integration provides several key benefits:
Improved Data Validation : JSON Schema ensures that entered data adheres to predefined rules, reducing errors and inconsistencies. Real-Time Feedback : As data is inputted, immediate feedback is provided if something doesn’t meet the validation criteria, allowing for quick corrections. Consistent Data Formats : By standardizing data formats across different parts of the interface, seamless integration between components is ensured.
Creating a New Schema
There are two methods to create a new schema:
Via the Stores Panel:
- Select the
Data Definitionsstore in the stores panel. - Click
add. - Users can either write their own schema or create one based on provided data.
- Select the
Via Workflow Step:
- In a workflow step, there is a new property called
Schema. - Clicking on its value opens the schema creator.
- Similar to the stores panel method, users can either write their own schema or create one based on provided data.
- In a workflow step, there is a new property called
Using Data to Pre-Create a Schema
To utilize existing data for pre-creating a schema:
- Click
Auto-Detect Data Types and Create Schema. - Paste the data into the expanded box.
- Click
Generate Schemato create a new schema in the box below. - Update the generated schema as needed and hit
Applyto save it.
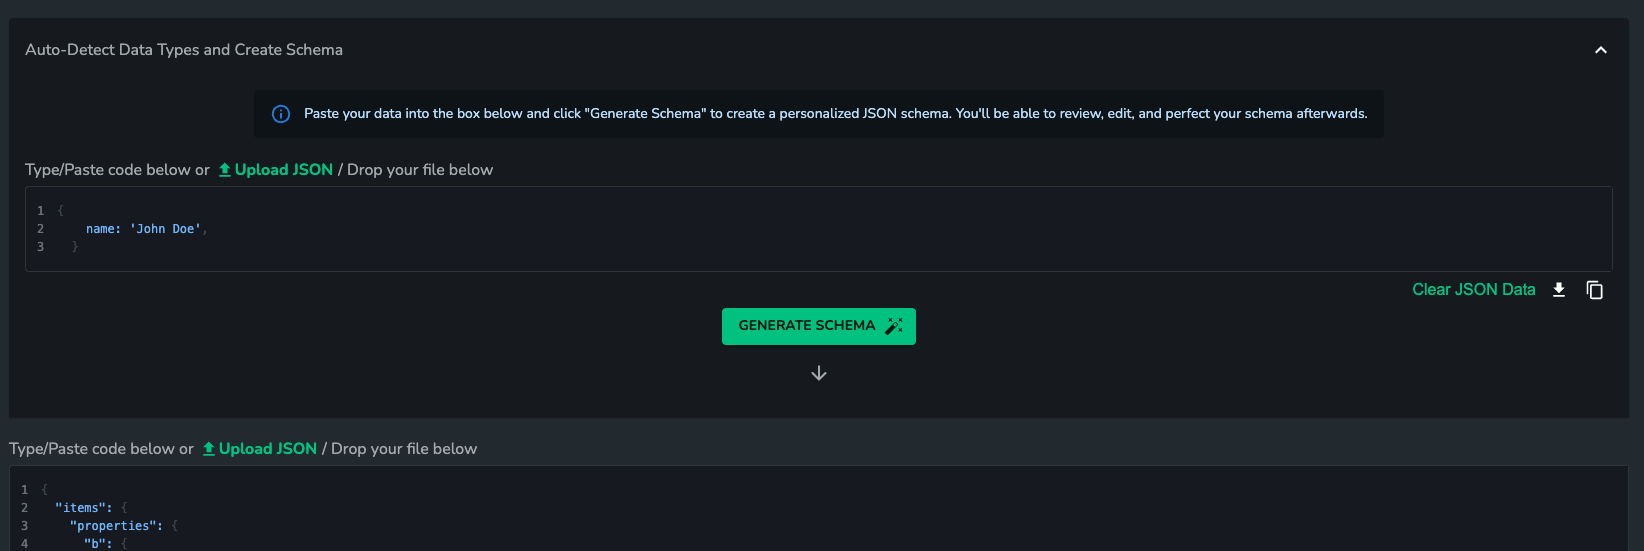
Auto-Generated Schemas
Auto-generated schemas are created only if there is no linked schema and no previously generated schema. This process occurs behind the scenes when the workflow is running. Note that auto-generated schemas differ from those generated based on data in the schema editor (see: "Creating a New Schema").
Validation Process
Data validation operates based on specific scenarios:
- Scenario 1: Mandatory Schema Validation All data inputs are validated against the schema during every workflow execution in all environments. This ensures strict compliance with defined rules when the schema is marked as required.
- Scenario 2: Optional Midstep Schema When a midstep schema is optional, validation only occurs in the Alpha environment. This allows for more flexibility during development and experimentation.
- Scenario 3: Validation Step Use a dedicated workflow step to validate data (ideal for user inputs). This is special workflow step that can be used to validate provided data (e.g., when working with user input). This test runs with every workflow execution in every application environment.
Schema Indicators
Workflow steps now display schema indicators, which come in three colors:
- Red: The schema has not been linked. This indicates a missing schema from the workflow step.
- Blue: The schema has been auto-generated. This means the midstep has generated a schema. While these schemas are usually complete enough to cover most cases, they are not very specific. It is highly advised to promote auto-generated schemas for better type coverage.
- Green: The schema has been linked. This means either the schema was created by a user or an auto-generated schema has been promoted.
Schema Promotion
In the case of auto-generated schemas, users can preview, edit, and then promote the schema. The goal of promotion is to clarify the difference between an auto-generated schema and one that has been reviewed by a user.
Promoting a Schema
There are two ways to promote a schema:
Via Workflow Editing:
- Go to the
Datasection when editing the workflow. - Select
Data Schemas. - Navigate to the
_generatedsection and find the ID of the schema, which matches theworkflow step id. This ID is also displayed in step properties asgenerated: id, whereidis the ID of both the workflow step and the schema. - Selecting the schema and clicking the
editbutton opens up a schema promotion modal.
- Go to the
Directly from Workflow Step:
- Users can click on the
generated: id, which opens up a schema promotion modal.
- Users can click on the
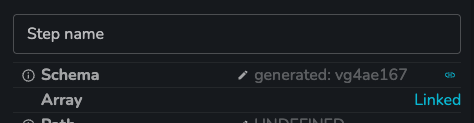
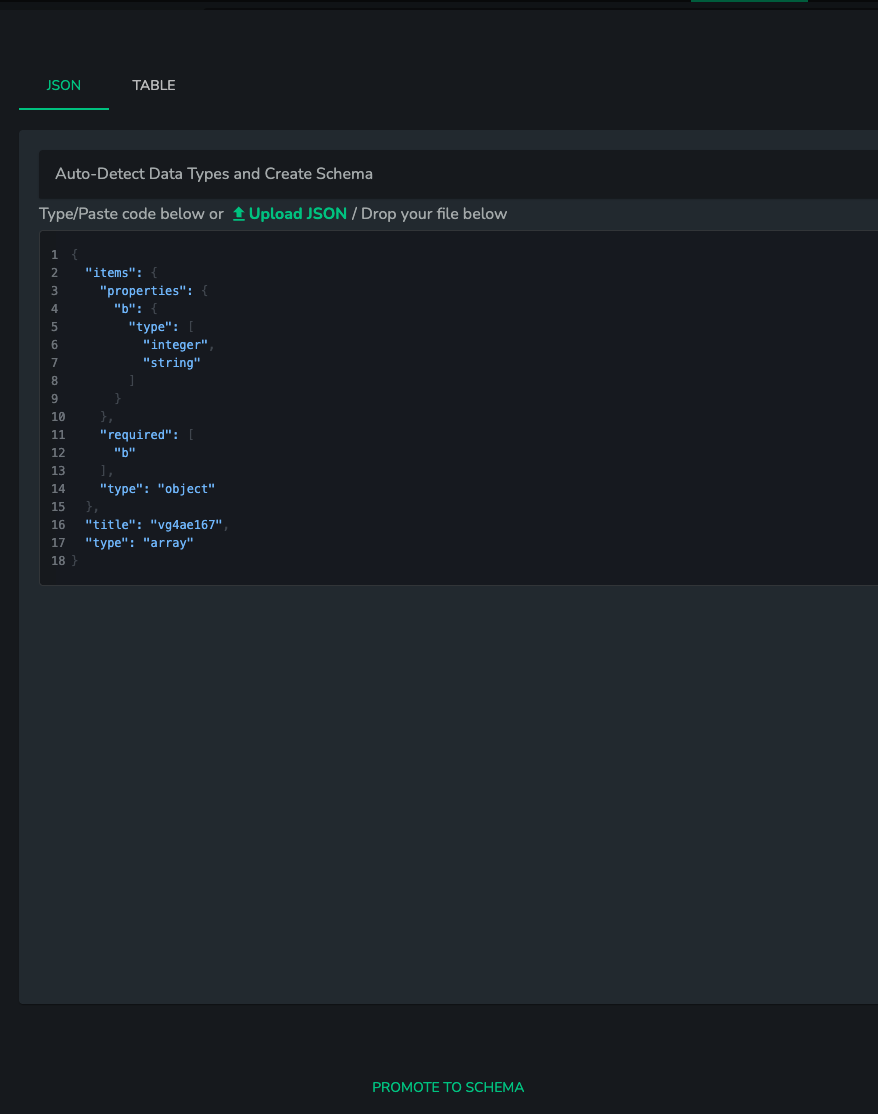
The modal allows for editing an automatically generated schema or creating a new one based on data (see: "Creating a New Schema"). Once satisfied with the schema definition, clicking on promote will close the modal, save the new schema under a key name matching the title property of the schema (or workflow ID if the title is missing), and automatically link it to the workflow step that was using it. The schema indicator will change color to green.