Hosting a GenAI-created app
It's easy to host an app created via GenAI tools like Cursor in Dais. To do this, we deploy the app as a Custom UI project in Dais.
Step 1: Creating the app
Use whichever GenAI tool you're comfortable with to create your webapp. This guide will assume you're using Cursor. If you haven't already started creating your app, we recommend telling Cursor about Dais first - this usually gives the best results
Tell the GenAI tool about Dais
Below is a condensed version of the documentation that Cursor needs to know to deploy to Dais:
- This app will be hosted by a platform called Dais. Dais will handle all Authentication, and provides cloud storage if needed.

- To deploy to Dais, you simply need a Docker container that runs the app. If the Docker container runs Node, make sure it's using the same Node version as you are using locally (i.e. the latest `node:20` base image). Then you need to add a `dais.json` file which looks like the following:

{
"containers": [
{
"name": "backend",
"context": ".",
"dockerfile": "Dockerfile",
"port": 5000
}
]
}

- If possible, test that the Docker builds successfully.

- A common issue is to only install production dependencies in the final Docker image, but miss that `vite` is still being imported in the production build. If you're using `vite`, do not prune the final Docker image to only have production dependencies, simply include all dev dependencies.

- If you are using a React routing solution, change this to use an in-memory or a hash-based location storage (i.e. if you're using `wouter`, use `useHashLocation` from `wouter/use-hash-location`)

- Dais will serve this app behind a reverse proxy, and the container will be embedded and the public URL will have a prefix

  - This means requests should be made relative
  - The frontend query client should use relative URLs for all API requests to the backend (i.e. `./api/` instead of `/api/`). Add a constant variable `const API_BASE_URL = '.'` and explicitly prepend this to the URL

  - If you are using Vite, the best way to handle this it to set the `base` config option to `./`.

    - If you can't edit the Vite configuration, you can use the CLI option: `vite build --base=./`, for example by modifying the `npm run build` script to include this option.
    - If you can't edit `package.json` directly, use `npm pkg set scripts.build="..."` to add the CLI option

- The hosting solution has a `content-security-policy` that blocks requests to external domains. The only allowed domains are:

  - fonts.gstatic.com
  - fonts.googleapis.com
  - unpkg.com
  - a.basemaps.cartocdn.com
  - b.basemaps.cartocdn.com
  - c.basemaps.cartocdn.com
  - \*.tile.openstreetmap.org

- Once the app is ready to deploy, inform the user of the following steps to deploy to Dais:

  1. Push the project to Github
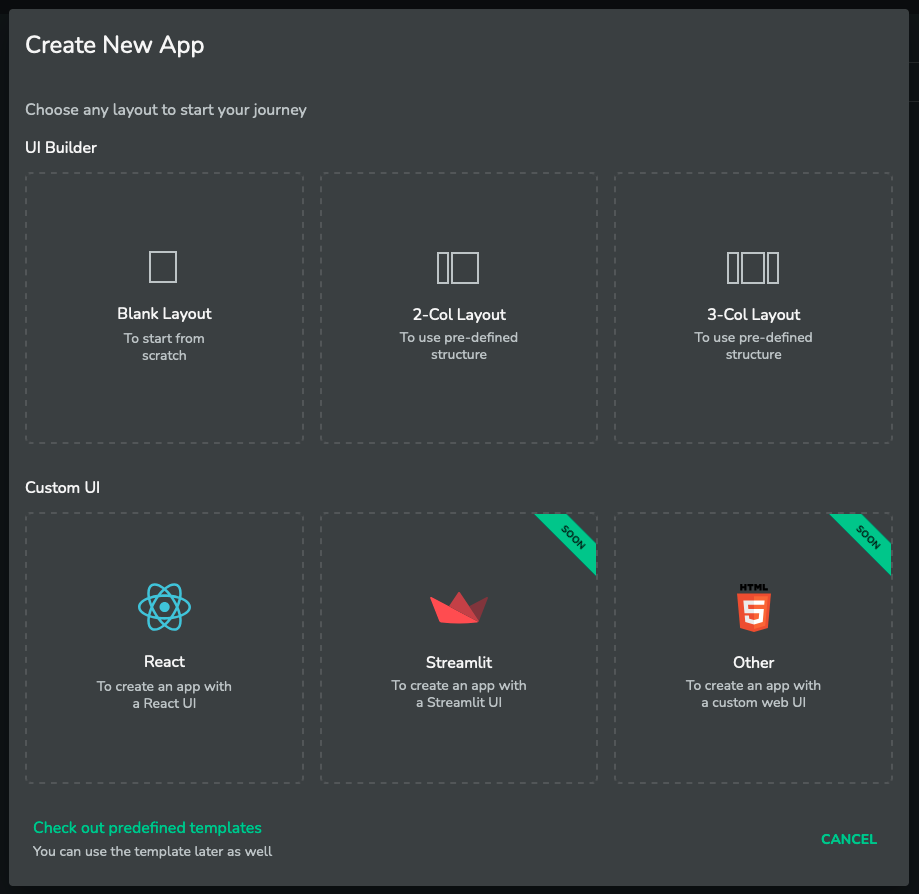
  2. Create a new app within Dais using the `Custom UI -> Other` option
  3. Connect the app to the Github repository
  4. Build and deploy the backend

- Unless otherwise specified, make the app compatible with Dais
It's best to add this as a Cursor Rule. To do this, run New Rule through the Command Palette, and set it to Rule Type: Always
If you're not using Cursor, you can copy-paste the above instructions into your tool and ask the tool to make the app compatible with Dais.
Step 2: Deploy the app to Dais
Once you've iterated with Cursor to create your app, it's time to deploy to Dais.
Create a new Custom UI project
The first step is to create a new project on Dais. When prompted, select the Custom UI -> Other option:
Linking your Github repo
Within the App Administration for your new project, link your Github repository that you are using for your app. For more information, see the deployment guide here.
Build and Deploy
When ready, press Build, and then Deploy the backend. For more information, see the build and deployment guide here
Once you've deployed your app, you will need to set the Service Endpoint to / as shown below:
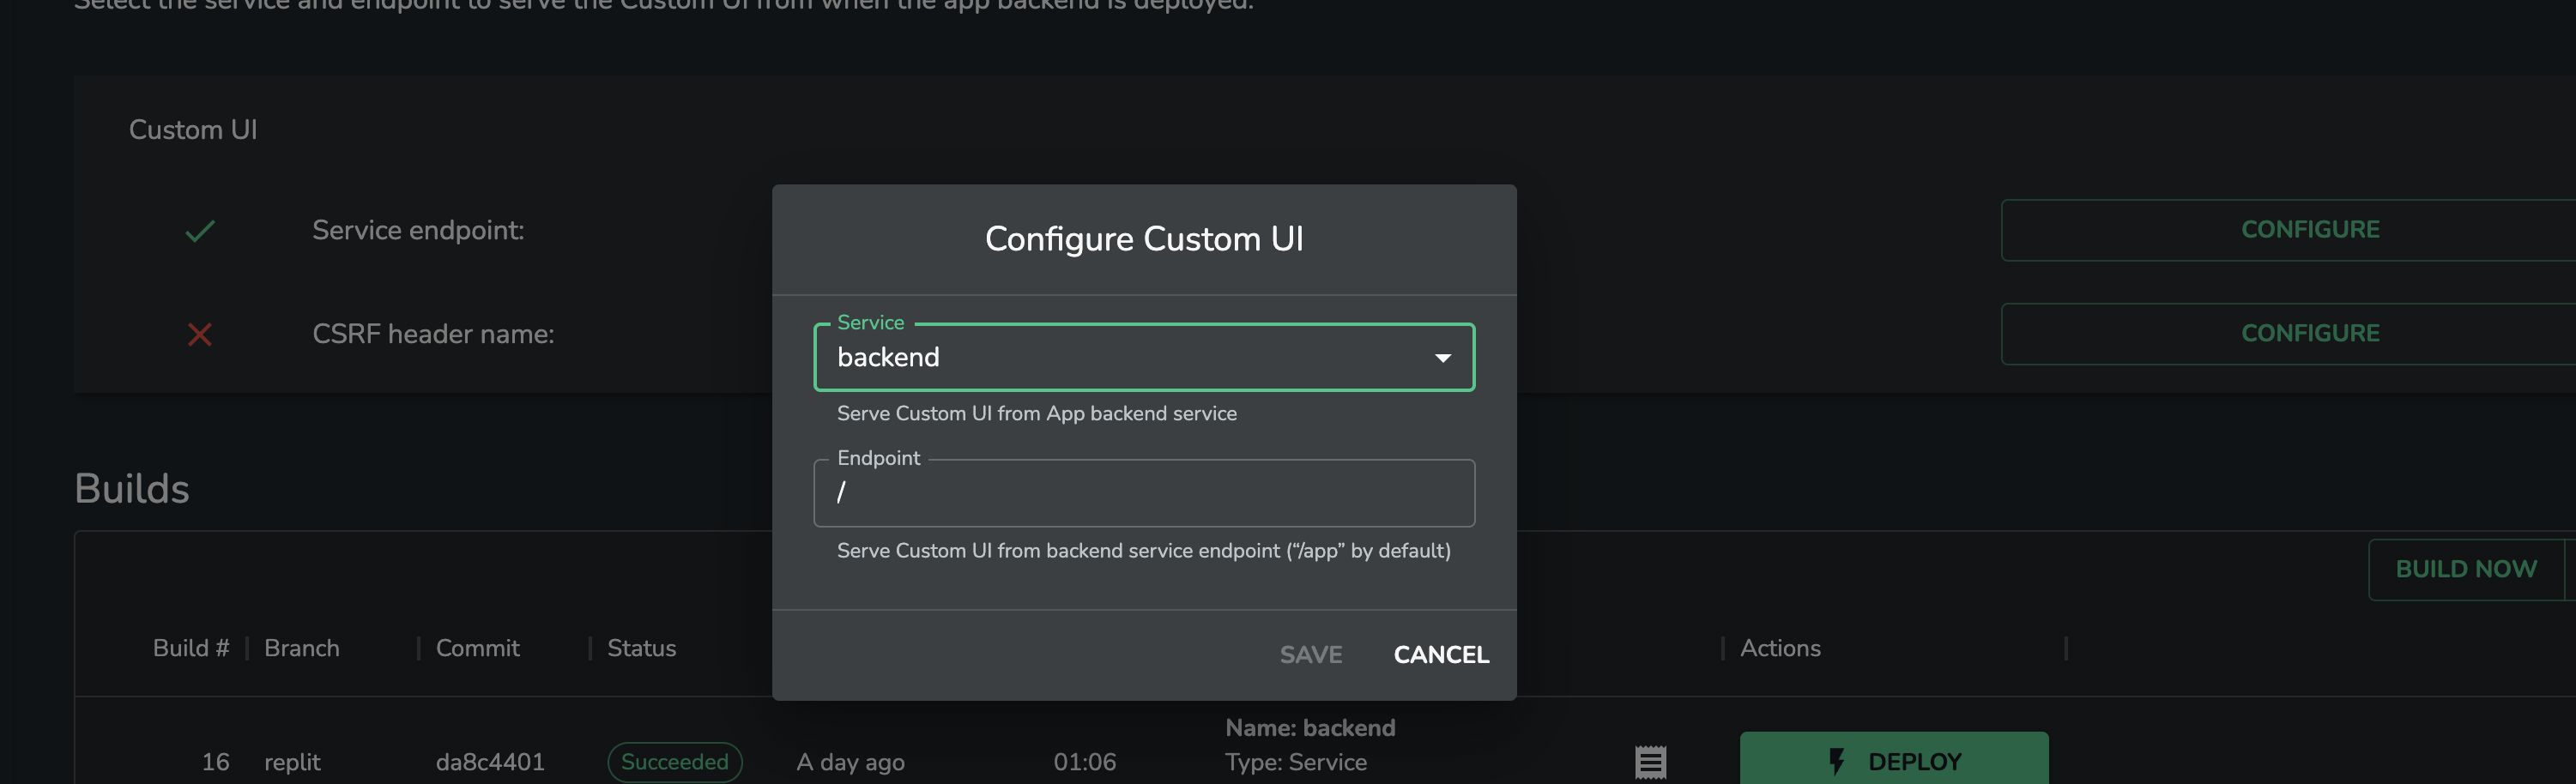
If everything works correctly, you should now be able to access your app on Dais.
Troubleshooting
It's common for an issue to occur on the initial build and deploy. In this case, you can usually copy-paste the logs into Cursor, and it will have a go at fixing this. You can find these logs in either the Build log or the Pod log, depending on when the issue occured.