Integrating Dais with your Single Sign-On (SSO) Provider
Note: this applies to Dais versions >=2.18.0
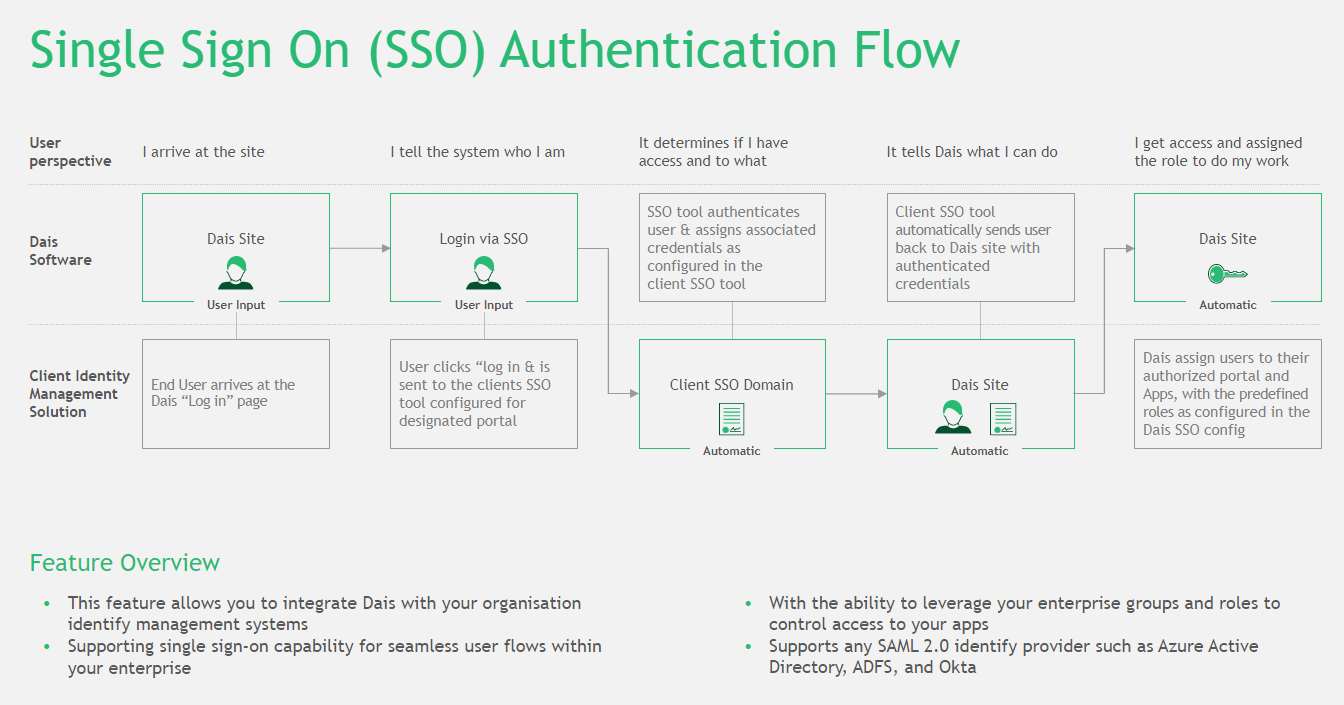
Dais supports the Security Assertion Markup Language 2.0 (SAML 2.0) standard for communicating with SSO authentication providers, such as Okta.
It's easy to setup this integration, but right now it requires Dais super-admin privileges.
Adding the SSO Strategy
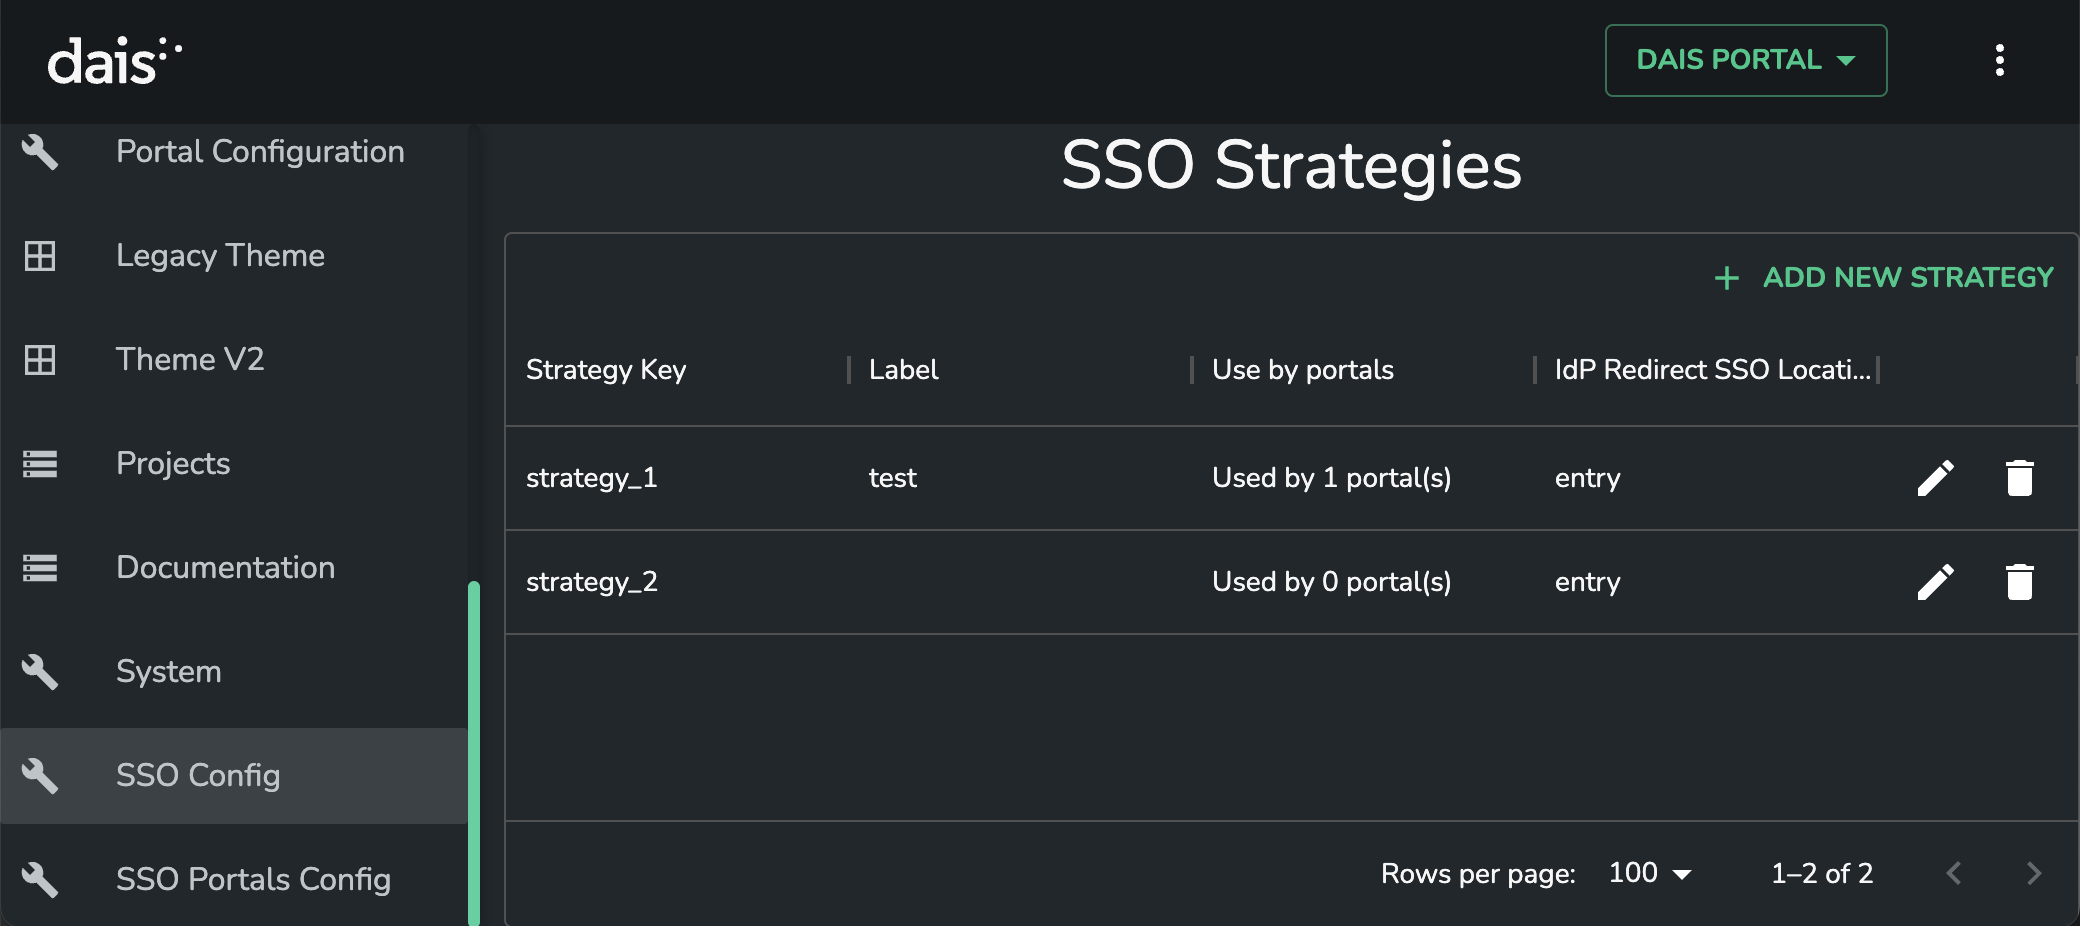
The first step is to add an SSO Strategy. This represents the basic connection between Dais and the SSO Provider (also referred to as the IdP).
To add a new Strategy, click + Add New Strategy, and fill out the form in the dialog. The most important options are:
SSO strategy key- this is the ID of the strategy. This is used as part of theAssertion Consumer Service URL, so you will most likely never want to change this field once you have set it.ACS Hostname-Shared DomainorCustom Domain. Only useCustom Domainif you want this SSO Strategy to be used on one, single, portal-prefixed domain URL (I.e.portal-name.gamma.bcg.com). For most cases, you will want to use theShared Domain, which allows this SSO Strategy to be shared across multiple portals.Advanced Config->Issuer- Also referred to as the 'EntityID' in SAML 2.0. Most often this can simply the the URL of Dais.User Claims- this tells Dais which attributes (or 'Claims') returned from the IdP to use for a users email, first & last name. Also optionally specify a claim to use inRole Mappingsas agroupkey.
And that should be it! In your IdP provider, you'll usually just need to input:
Issuer(also referred to as theEntityID) that you configured aboveAssertion Consumer Service URL- this is displayed in the Dialog above, once you've filled out the form- You may need a
Sign on URL- use either the root shared-domain of Dais, or a custom portal-prefixed domain, depending on if you specifiedShared DomainorCustom Domainabove.
SSO Portal Mapping
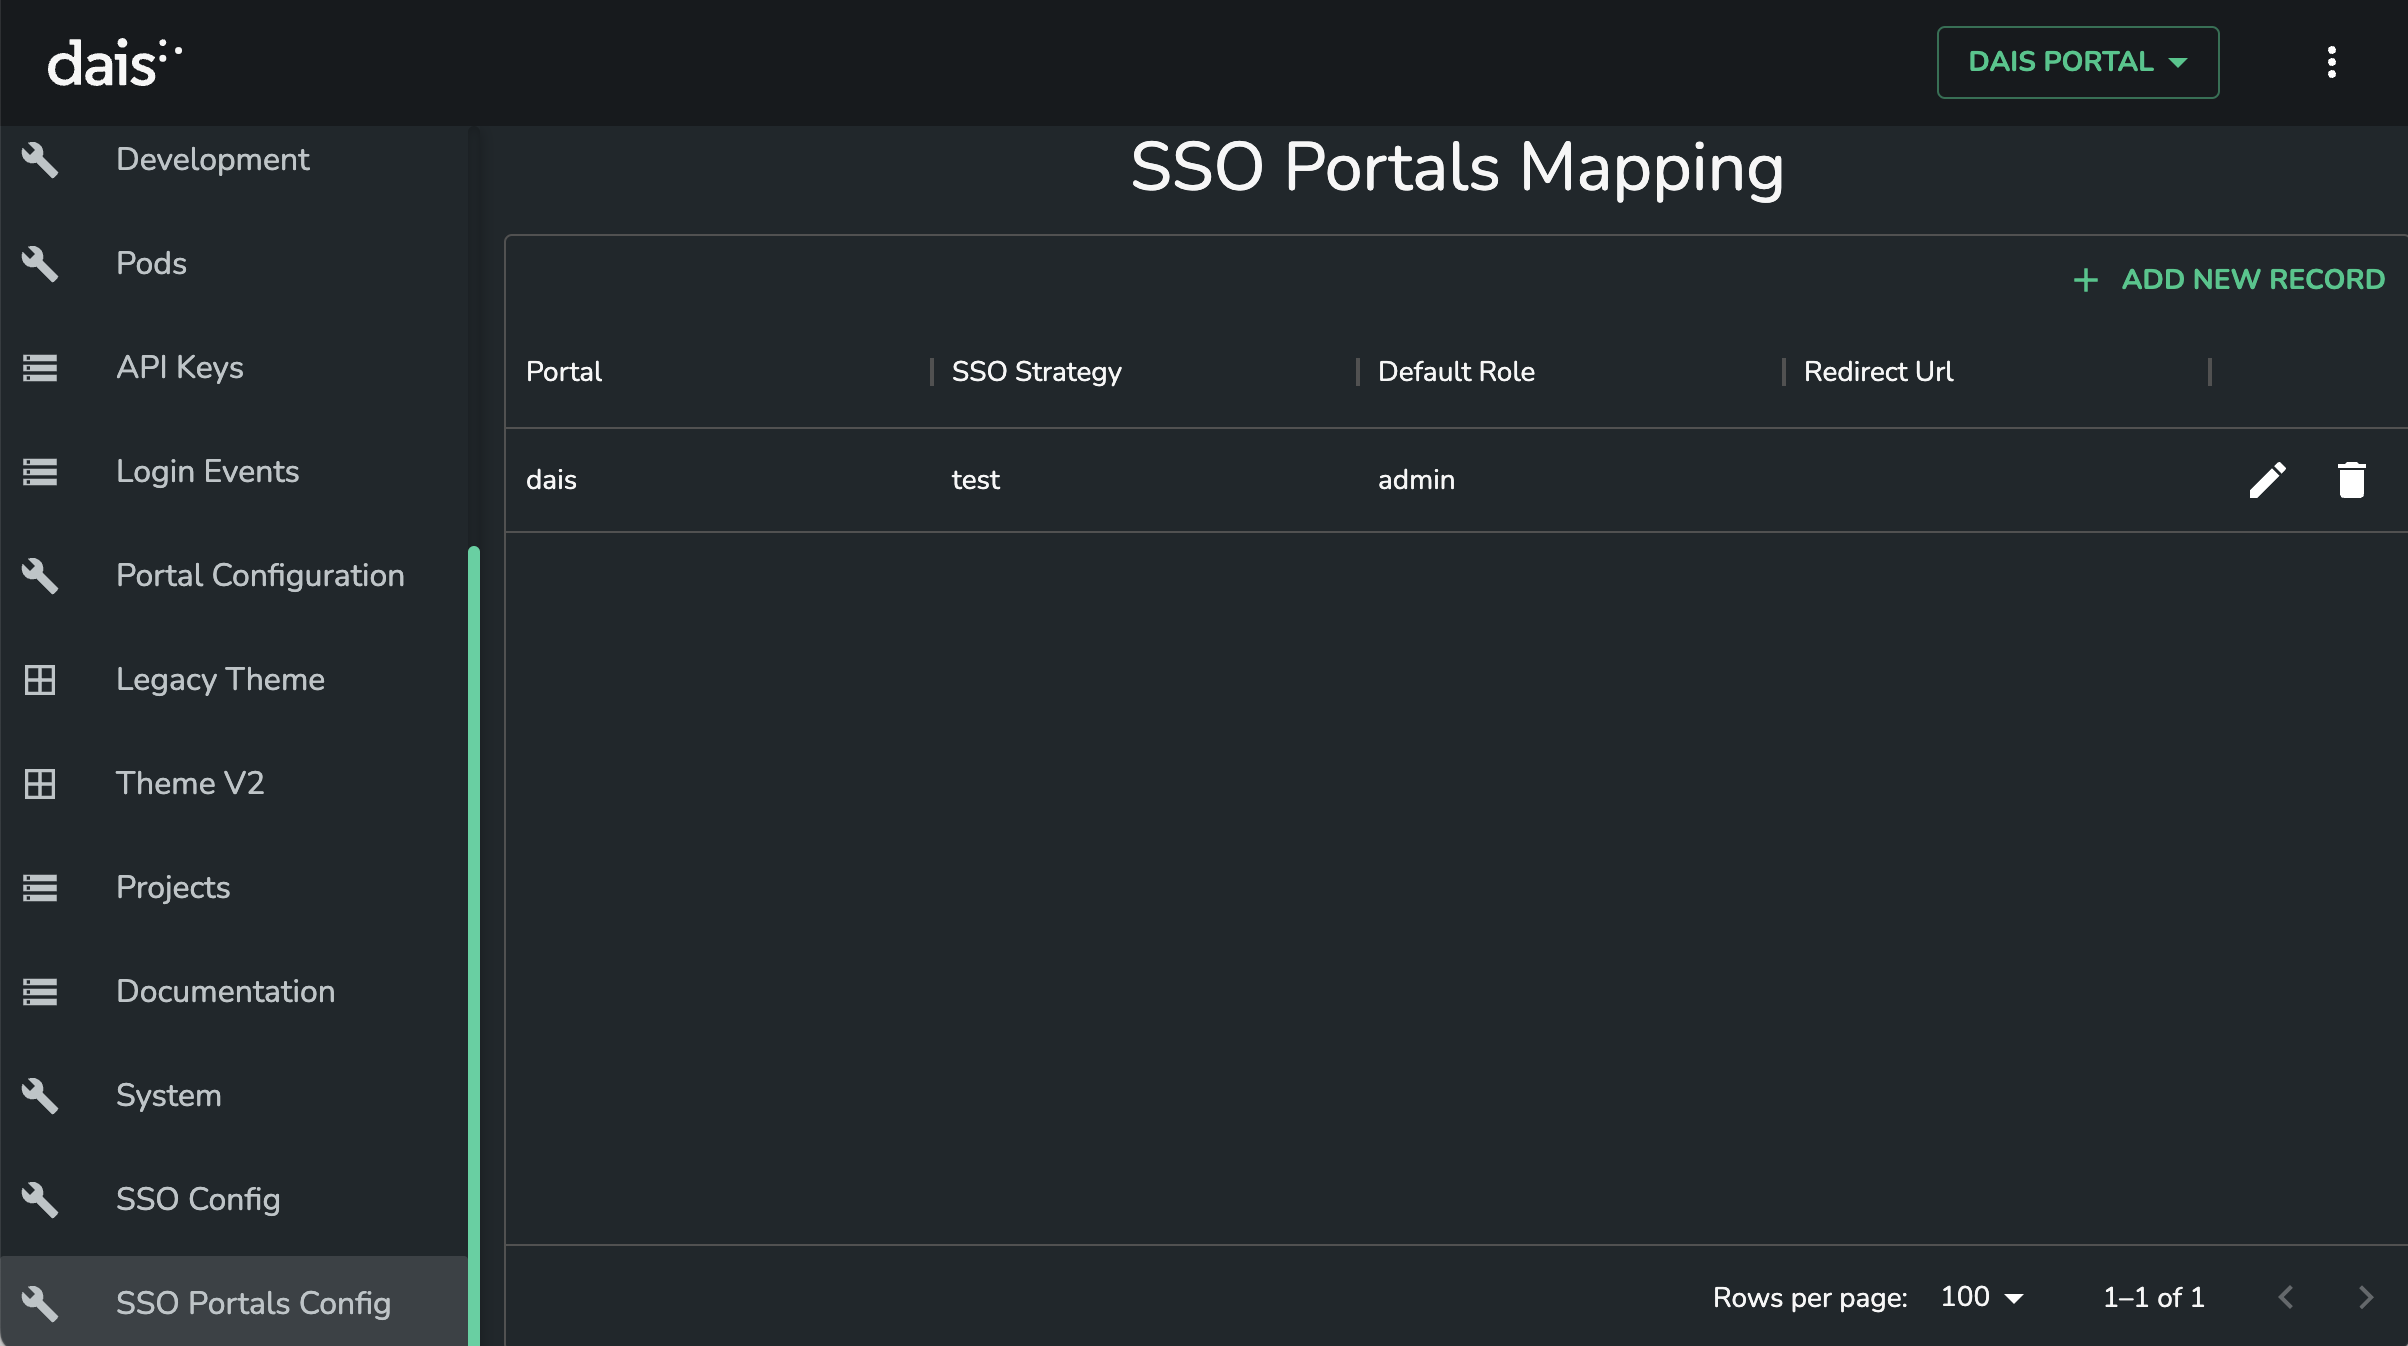
Once you've setup your SSO Strategy, you can enable it's usage on a Dais Portal. This is done by adding an SSO Portal Mapping.
To add an SSO Strategy to an existing Portal, click + Add New Strategy, and fill out the form in the dialog. The most important options are:
Portal&SSO Strategy- the Portal & Strategy you want to linkUsergroup to add to User/Portal- this allows a user's email to be added as a usergroup to the User or the Portal on login. This is useful for some portal setups, but usually should be ignoredRedirect to URL on login- Allows specifying a custom URL to redirect the user to when they login. This can usually be ignoredDefault Portal Role- thePortal Roleto assign to a user when they first login to the portal. After the user's first login, changes to this field will not affect them on future logins.Role Mappings- Allows for complex associations of users, roles & permissions based on the user's email & claims from the IdP. See the form for more info.Email matching- This enables this portal to accessed via the shared-login form & the portal-switcher. It is necessary to specify the emails of all users who should have access to this portal - either via a list of emails, or glob-patterns (I.e.*@bcg.com). See the form for more info.Portal-specific Login Page- This configures the button shown on the portal-specific login pages. Almost always this can be left as the defaults.
A note on Dais < v2.18
If you have previously setup SSO integration on an older Dais version (prior to v2.18), you may be familiar with configuring a sso-config.yaml file. This has now been replaced with an Admin UI within the Dais super-admin portal.
If you have previously configured the sso-config.yaml and now have updated to Dais >= v2.18, an automated migration will have moved the SSO configuration into the UI. Any changes to sso-config.yaml will be ignored, and sso-config.yaml should be removed once you've updated past Dais v2.18.